
Sewing is a new found love that I discovered during my pregnancy. As my first project, I sewed two identical baby quilt for my niece and yet-to-be-born little one. I loved the process and it got me addicted to sewing. I have sewed quite a bit ever since, mostly PJs, bedding sets, play-mats etc for my little boy.
Completely self-taught, Pinterest has been my tutor and inspiration. I came across this idea of making onesie quilts, again while pregnant and decided right then that I was going to be making one for my baby someday! :)

I simply had to make this quilt and gathering the materials for it meant waiting for him to grow up a bit and actually outgrow the clothes! Hence, ever since he was born, I have been carefully selecting a keeping aside some of the cute little clothes he outgrew. I gave away most but a kept a few for this project of mine!

Being a sucker for pretty fabric, I scouted around a fair bit to get the perfect fabric to go with my quilt project. I got this pretty cartoon print and felt it matched perfectly with my collection of baby clothes. Finally after my boy turned 16 months, I had just the right set of clothes and the perfect matching fabric and so I got around making the quilt. I could get to it in instalments and so I took me about 5 days (approx 6-7 hours in total) to complete this project.

Oh, cutting up the adorable baby clothes was the toughest part! How cute and tiny they are! But well, the final outcome was very satisfying and I was immensely pleased with it. Every effort felt worth it all and I was glad to have created this little memory keepsake for my son to cherish for years to come!

Baby Clothes - As many as you want! I used up about 18-20 onesies and t-shirts.
Interfacing Material - to give firmness to the cloth pieces.
Batting Material - to give a soft cushiony feel to the quilt.
Sewing Pins
Scissors
Coloured Threads
Procedure:
- Gather all the baby clothes that you wish to use for this project. Pretty prints, bright colours are best suited.

- Lay out each dress and flatten out any creases.
- Neatly cut out the seams, sleeves, neck hole etc so at to get a single piece of cloth (or two in case you wish to use the backside too.) Make sure you cut very close to the stitches so that you get a good piece of printed cloth for making the quilt.


- Once you have cut out the pieces from every baby dress that you have gathered, lay them out to get an idea of the quilt. Remember this may not be the final layout as it constantly changes based on the final cut of the pieces and also your preference of the order of the patterns. This step is primarily to give you an idea of how big the quilt is going to turn out.

- Interfacing is a material to give shape and strength to cloth that is soft and that doesn't hold shape by itself, for e.g. t-shirt material. Since most baby clothes are going to be t-shirt material, this step is crucial and should not be missed. Each piece that has been cut out needs to be fused with interfacing before going about the next step of sewing them together. Time consuming, but totally worth it!
- Place the baby clothes pieces with the right side facing down. Make sure there are no creases. Now, place the interfacing material with the sticky side facing the wrong side of the cloth.

- Using a heated iron box, iron the two together to fuse them. The cloth and the interfacing material will stick together making the cloth piece firm and crisp.

- Once you have completed this step, you will have a nice bundle of crisp cloth pieces to work with!

- Now for some proper measuring and cutting. Measure out each cloth piece and cut them into squares or rectangles. This process takes a lot of planning as some of the tinier cloth pieces will be very small while the bigger one will have more cloth and hence can be cut into larger squares or rectangle. Cut them based on how you would like them to be. It totally depends on your collection of clothes.

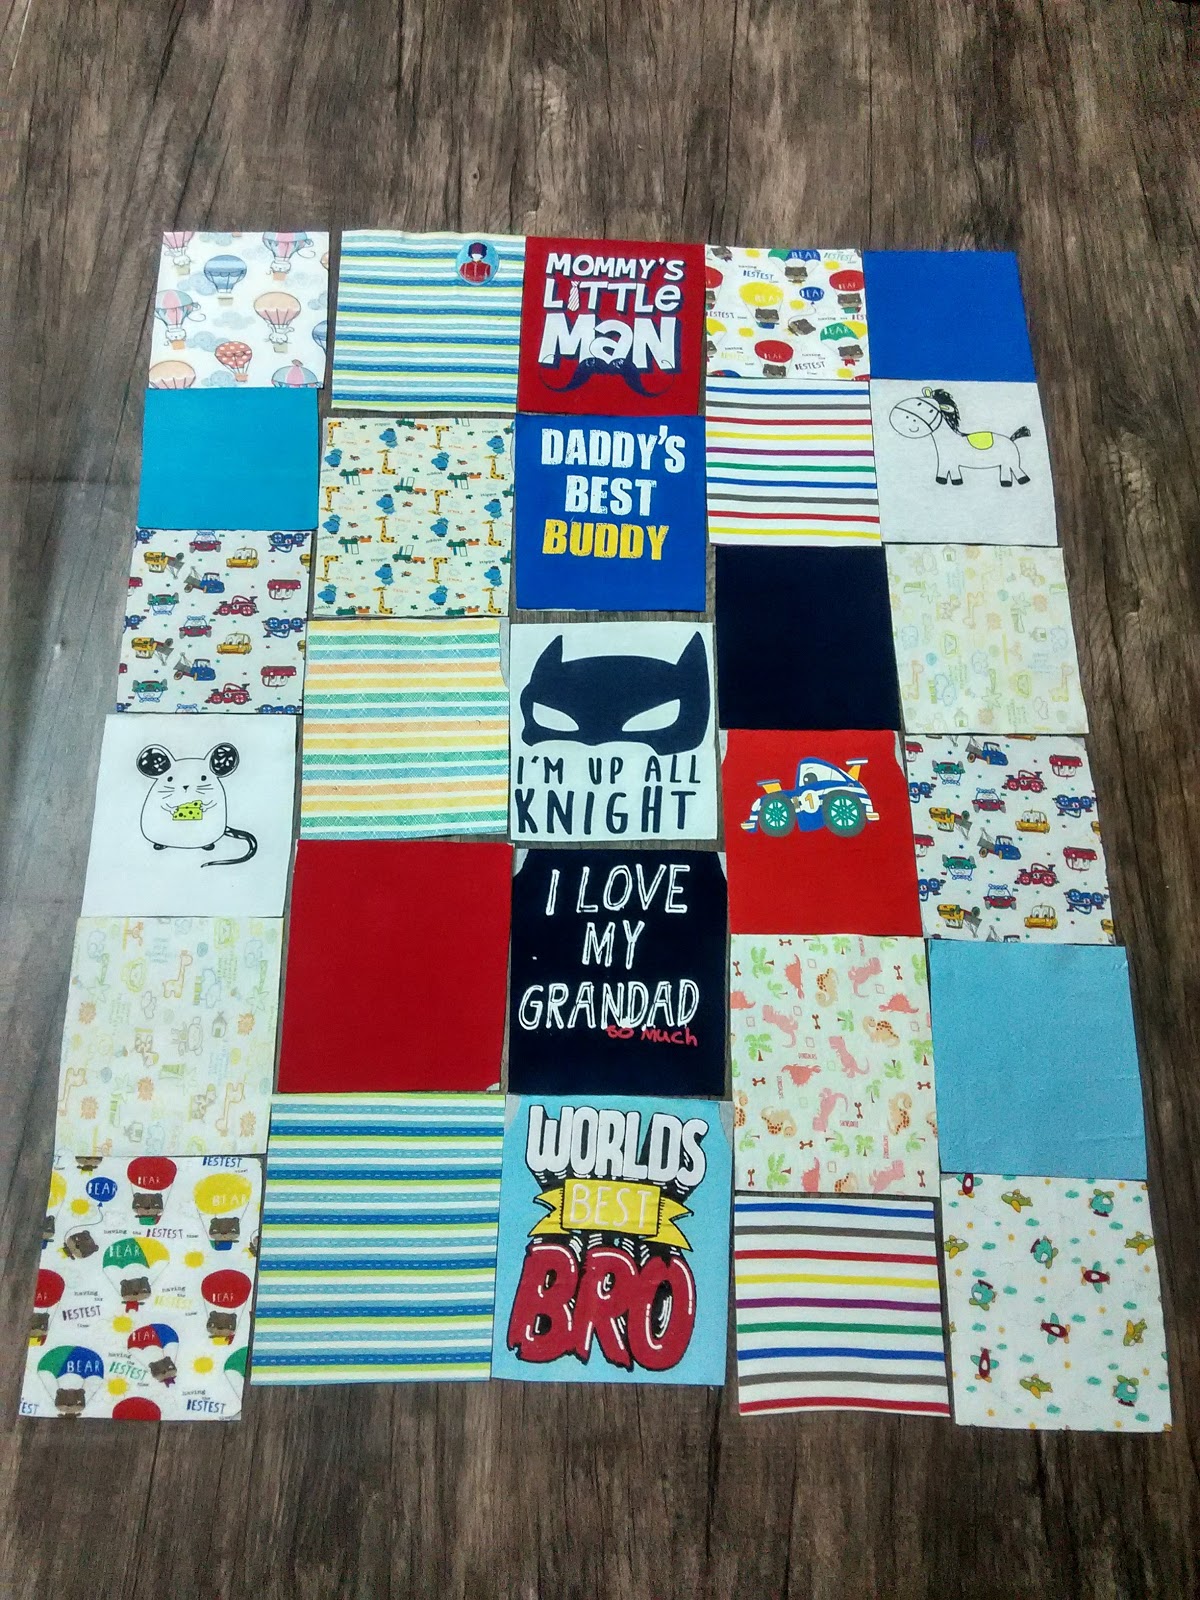
- Now, lay out the crisp, neatly cut squares and rectangles to get a better idea of the final quilt. See, how different it looks from the first layout?! :)
Now lets begin sewing! :)

- Since the pieces are not all of the same size, in my quilt, I have made sure the vertical columns are in line and hence I begin sewing them together.
- Place the first two pieces together with the right side facing each other, using sewing pins, pin them up as this will help you sew easily. Sew at the joint that they meet.
- Once done, take the third piece and place it against the second piece that is already sewed onto the first piece, right sides facing each other and pin them up together. Sew at the intersection. Continue this way till you complete the column.
- Repeat this process for the rest of the columns, I had 5 columns in my quilt.

- Now, place the first two columns together, right side facing each other and pin them up at the intersection. Sew through. Repeat this process for the rest of the columns just like you did this.

You now have you quilted side ready! :)

- Time to add the batting material. I used a thin baking material (200 gsm) for my quilt as I did not want to to bulky.
- Cut out the batting material to the size of your quilt.

- Using sewing pins, pin the cloth to the batting material all around. Make sure there are no creases. Sew all around to bind the cloth and the batting material.

Place the cloth material that you wish to use for the other side of the quilt below with the right side facing down. Place the cloth-batting material on top with the wrong sides facing each other.

- Fold up the second material over the quilted side so as to form borders. Measure as required and pin them up to hold shape.

- Finally sew it all around once or maybe twice to give it a firm finish. I sewed on the border twice to make it pretty, after sewing the quilt once to just bind everything.
- Also, it is suggested that you sew a couple of loops randomly (by hand) in the middle of the quilt just to make sure the two sides stay together.

That's it, your quilt is ready! :) My little man explored, examined and approved of the pretty colourful quilt made with his own clothes! :)


This is so well explained and made with so much finesse
ReplyDelete